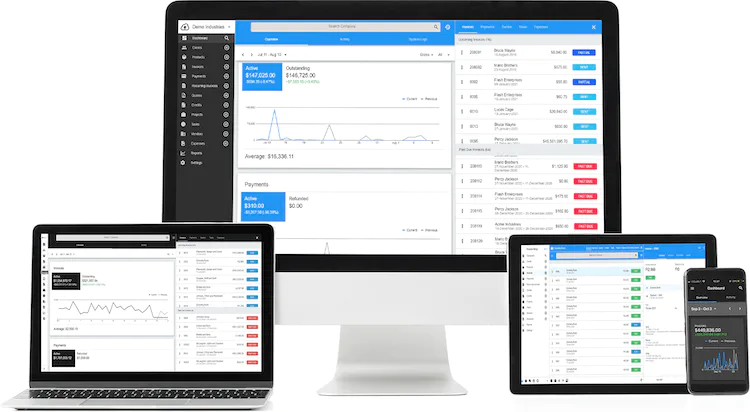
Invoice Ninja is a helpful online invoicing tool specially made for small and medium-sized businesses and freelancers.
With this tool, you can do a bunch of useful stuff, like creating and sending invoices, keeping track of expenses, managing vendors, and even automating some of your work.
But to make it run smoothly, you’ll need a few things: PHP, MySQL/MariaDB, and either an Apache or Nginx web server.
Why You Should Install Invoice Ninja on Ubuntu 20.04
Now, you might wonder why it’s so important to install Invoice Ninja on Ubuntu 20.04. Well, there are some good reasons for that. First off, Ubuntu 20.04 is a long-term support (LTS) release.
That means it’s like a sturdy rock in the stormy sea of software updates. You see, LTS releases get security fixes and bug squashes for a long time, which makes your system safer and more reliable.
But that’s not all. Ubuntu 20.04 is also a popular choice for web servers. It’s like the preferred playground for Invoice Ninja.
When you host Invoice Ninja on Ubuntu 20.04, you’re giving it a comfy home where it can work its invoicing magic seamlessly.
Read also: Invoice Ninja Pricing Breakdown: What’s Best for You?
Requirements for Installing Invoice Ninja on Ubuntu 20.04
If you’re looking to install Invoice Ninja on your Ubuntu 20.04 system, there are some important things you need to have in place. Let’s break down the essential requirements you’ll need to make sure you have before the installation.
1. Ubuntu 20.04 Operating System
This is the foundation of your system. Make sure you’re running Ubuntu 20.04 or a compatible version.
2. LAMP Stack (Apache, MySQL, PHP)
The LAMP stack is like the engine that powers Invoice Ninja. It consists of Apache (a web server), MySQL or MariaDB (databases), and PHP (a scripting language). These components are crucial for Invoice Ninja to work properly. They help it store and retrieve data, as well as handle web requests.
3. Composer
Think of Composer as a helpful assistant. It’s a tool used to manage all the extra bits and pieces that Invoice Ninja needs to run smoothly. Composer makes sure everything is in the right place and works together.
Why Are These Requirements Important?
Let’s take a closer look at why these requirements are necessary:
Ubuntu 20.04 Operating System
Invoice Ninja is designed to work with Ubuntu 20.04. Using the correct operating system ensures compatibility and stability.
LAMP Stack (Apache, MySQL, PHP)
The LAMP stack provides the essential environment for running PHP scripts (which Invoice Ninja is built with) and managing databases. Apache serves your web pages, MySQL or MariaDB stores your data, and PHP processes your requests. They’re like the backbone of your Invoice Ninja system.
Composer
Composer helps manage the additional pieces of code that Invoice Ninja relies on. It’s like making sure you have all the right ingredients before you start cooking. Without Composer, the software might not function correctly.
Related: Invoice Ninja Free Plan: Is It Worth It?
How to Install and Running Invoice Ninja on Ubuntu 20.04
Once you’ve checked off all the requirements, you’re ready to install and run Invoice Ninja on your Ubuntu 20.04 system. You can choose to use either Apache or Nginx as your web server, depending on your preference.
Below are the step-by-step instructions for installing Invoice Ninja on Ubuntu 20.04. These instructions will help you set up your own Invoice Ninja system on a server. Remember, it’s important to follow each step carefully.
Step 1: Update System Packages
First, let’s make sure your system is up-to-date. Run this command:
sudo apt-get update
This command ensures your system has the latest updates and security patches.
Step 2: Install Apache Web Server
Now, let’s install the web server called Apache. Use these commands:
sudo apt-get install apache2
After that, enable and start Apache with these commands:
sudo systemctl enable apache2
sudo systemctl start apache2
This gets your web server up and running.
Step 3: Install MySQL Database Server
We need a database to store Invoice Ninja’s data. Install MySQL with this command:
sudo apt-get install mysql-server
After installation, secure your MySQL server:
sudo mysql_secure_installation
This ensures your database is protected.
Step 4: Install PHP and Required Extensions
Invoice Ninja relies on PHP and some extensions. Install them like this:
sudo apt-get install php libapache2-mod-php php-mysql php-curl php-json php-gd php-mbstring php-xml php-zip
These PHP components are essential for Invoice Ninja to work properly.
Step 5: Install Composer
Composer is a tool to help manage software libraries. Install it globally with these commands:
cd ~
curl -sS https://getcomposer.org/installer -o composer-setup.php
sudo php composer-setup.php –install-dir=/usr/local/bin –filename=composer
This makes it easier to manage dependencies.
Step 6: Download and Install Invoice Ninja
Now, let’s get Invoice Ninja and set it up:
git clone https://github.com/invoiceninja/invoiceninja.git /var/www/invoiceninja
sudo chown -R www-data:www-data /var/www/invoiceninja
sudo cp /var/www/invoiceninja/.env.example /var/www/invoiceninja/.env
This gets Invoice Ninja on your server and prepares it for configuration.
Step 7: Configure Apache for Invoice Ninja
To make Invoice Ninja work with Apache, create a virtual host:
sudo nano /etc/apache2/sites-available/invoiceninja.conf
Then, enable the virtual host and restart Apache:
sudo a2ensite invoiceninja.conf
sudo systemctl restart apache2
This configures Apache to serve your Invoice Ninja site.
Step 8: Set Up the Database
Now, we’ll create a database and user for Invoice Ninja:
sudo mysql -u root -p
Enter your MySQL root password. Then, in MySQL, run these commands:
CREATE DATABASE invoiceninja;
CREATE USER ‘invoiceninja’@’localhost’ IDENTIFIED BY ‘password’;
GRANT ALL PRIVILEGES ON invoiceninja.* TO ‘invoiceninja’@’localhost’;
FLUSH PRIVILEGES;
EXIT;
Finally, import the database schema:
sudo php /var/www/invoiceninja/artisan migrate
This sets up the database for Invoice Ninja.
Step 9: Complete the Installation
To finish the installation, go to your domain followed by “/setup” in your web browser (e.g., https://your-domain.com/setup). Follow the on-screen instructions to create an admin account and complete the setup.
These steps help you install Invoice Ninja on Ubuntu 20.04 with Apache web server.
Read also: Invoice Ninja Integrations: Discover the Power of Integrations
Final Thought on Installing Invoice Ninja on Ubuntu 20.04
To wrap it up, installing Invoice Ninja on Ubuntu 20.04 is a smart move. It’s like putting your invoicing and payment management on a solid foundation.
Ubuntu 20.04 is like the foundation of a house. It’s a long-term support (LTS) release, meaning it’s super reliable and will keep getting updates and fixes for a long time.
It’s also a top pick for web servers, which makes it perfect for running Invoice Ninja.
Keep in mind that it’s crucial to meet the requirements for installing Invoice Ninja on Ubuntu 20.04 before you dive into the installation process.
By following the installation steps provided in the article carefully, you’ll be up and running with Invoice Ninja in no time, ready to manage your invoicing needs effectively.
Whether you prefer Apache or Nginx as your web server, these prerequisites will make sure Invoice Ninja works seamlessly on your system.
If You Get Stuck
If you hit a roadblock during installation, don’t give up! Reach out to the Invoice Ninja community or connect with an Invoice Ninja expert. They’re there to lend a hand and make sure you succeed.
So there you have it, installing Invoice Ninja on Ubuntu 20.04 is like putting together the pieces of a puzzle. Follow these steps, and you’ll have a powerful tool at your fingertips for managing your invoices and finances. Happy invoicing!


