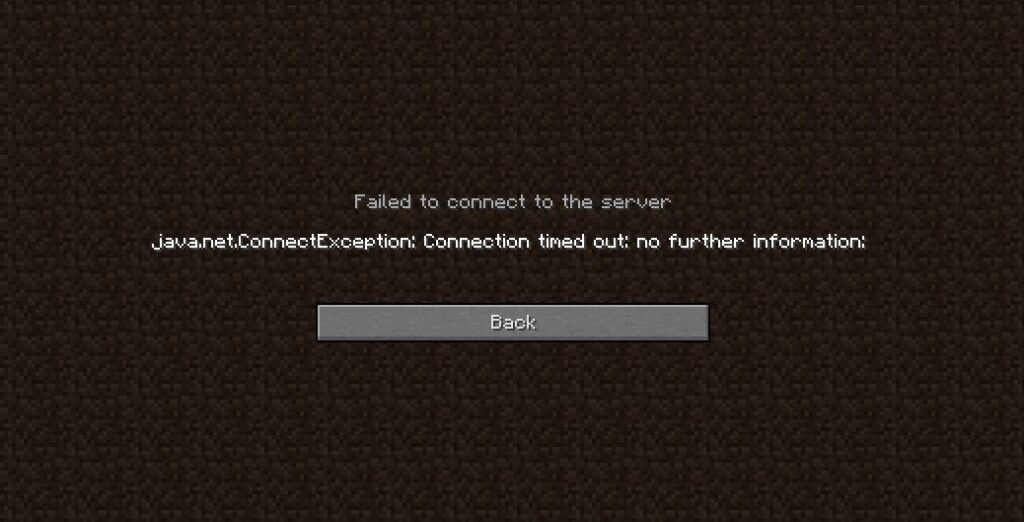
In the world of online gaming, having a Minecraft server that’s always up and running is paramount.
Picture this: You and your friends have been eagerly planning an epic adventure, but just as you’re about to embark, the server goes offline. It’s a scenario every Minecraft enthusiast dreads.
In this guide, I’ll walk you through the steps to ensure your Minecraft server remains stable. This will guarantee uninterrupted gameplay for you and your fellow adventurers.
So, let’s dive into the key strategies for keeping your Minecraft server always up and running smoothly.
#1. Choosing the Right Hosting Provider
Selecting a reliable hosting provider is crucial for a smooth and uninterrupted Minecraft gaming experience.
Here are some factors to consider when choosing a hosting provider:
Server locations: Choose a hosting provider that has servers located in regions closest to your players to minimize latency and ensure a lag-free gaming experience.
Server specifications: Look for a hosting provider that offers high-performance servers with sufficient RAM, CPU, and storage to handle the demands of Minecraft.
Pricing options: Look for a provider that offers flexible pricing plans that suit your budget and gaming needs.
Customer support: Choose a hosting provider that offers 24/7 customer support to help you resolve any issues that may arise.
Reputation: Read reviews and ask for recommendations from other Minecraft players.
Some reputable hosting providers for Minecraft include Hostinger and Cloudpap.
Hostinger offers affordable plans with high-performance servers and 24/7 customer support.
Cloudpap offers reliable and scalable hosting solutions with servers located in multiple regions around the world.
Once you have chosen a hosting service, you can follow their instructions for setting up your server and configuring it to run continuously.
#2. Setting Up a Dedicated Server
Advantages of using a dedicated server for a Minecraft server
Performance: Dedicated servers offer high-performance hardware, allowing for smooth gameplay and minimal lag. The resources of the server are solely dedicated to your Minecraft server, ensuring optimal performance.
Customization: With a dedicated server, you have full control over server settings, mods, and plugins. You can customize the server to suit your specific needs and preferences.
Scalability: Dedicated servers provide scalability, allowing you to easily upgrade or expand your server as your player base grows. You can add more resources or increase server capacity without experiencing downtime or performance issues.
Security: Dedicated servers offer enhanced security compared to shared hosting options. Since you are the sole user of the server, you have complete control over security measures and can implement robust security protocols to protect your server and player data.
Setting up a dedicated server for Minecraft
Hardware requirements:
1. A powerful CPU with multiple cores.
2. Sufficient RAM to handle the number of players and mods/plugins.
3. Adequate storage space for game files and player data.
4. A stable internet connection with sufficient bandwidth.
Choose a hosting provider: From the previous step, you have chosen a hosting service provider.
Select a server plan: Choose a dedicated server plan that meets your hardware requirements and budget.
Install the operating system: Once you have selected a server plan, follow the hosting provider’s instructions to install the operating system on your dedicated server. Most hosting providers offer a variety of operating systems to choose from, such as Linux or Windows.
Configure the server: After the operating system is installed, you will need to configure the server settings. This includes setting up the Minecraft server software, adjusting server properties, and installing any necessary mods or plugins.
Test and optimize: Once the server is set up, test it to ensure it is running smoothly. Optimize server settings, adjust resource allocation, and monitor performance to ensure the best gaming experience for your players.
Alternative hosting options
Virtual Private Servers (VPS): VPS hosting provides a virtualized environment where you have dedicated resources within a shared server. It offers more control and customization compared to shared hosting but may have slightly lower performance compared to dedicated servers.
Cloud hosting: Cloud hosting utilizes a network of virtual servers to host your Minecraft server. It offers scalability, flexibility, and high availability. Cloud hosting can be a cost-effective option, especially for smaller Minecraft servers.
#3. Installing and Configuring Minecraft Server Software
To download and install the Minecraft server software, follow these steps:
Step 1: Download and install the latest version of Java from the official website if you don’t already have it installed.
Step 2: Download the Minecraft server software from the official Minecraft website. Choose the version that matches your Minecraft game version.
Step 3: Create a new folder on your desktop. Name it “Minecraft Server.”
Step 4: Move the downloaded Minecraft server software into the new folder.
Step 5: Double-click the Minecraft server software to run it. This will generate some new files in the folder.
Step 6: Open the server.properties file using a text editor. This file contains the server settings that you can configure.
Step 7: Configure the server settings according to your preferences. Some important settings include:
World generation options: Choose the type of world you want to generate, such as a flat world or a world with mountains and valleys.
Difficulty level: Choose the difficulty level of the game, such as peaceful, easy, normal, or hard.
Maximum number of players: Set the maximum number of players that can join the server.
Server name: Set a name for your server.
Step 8: Save the server.properties file and close it.
Step 9: Start the Minecraft server software again. Your server is now up and running.
It is important to regularly back up your Minecraft server to prevent data loss in case of server crashes or other issues.
You can use backup plugins or manually back up your server files to ensure that you have a recent copy of your server data.
#4. Automating Server Maintenance
Benefits of Automating Server Maintenance
Time and Cost Savings: Automation reduces labor costs and saves time.
Increased Efficiency: Tasks run consistently and on schedule.
Reduced Errors: Automation minimizes human error for more reliable results.
Enhanced Productivity: Teams can focus on strategic projects.
Improved Security: Regular backups and updates enhance data protection.
Scheduling Backups and Updates
Backups: Use backup software or tools to schedule regular backups of your server data. Set a frequency that suits your needs, such as daily, weekly, or monthly backups. Ensure that backups are stored in a secure location, either locally or in the cloud.
Updates: Regularly check for software updates for your server operating system, Minecraft server software, and any plugins or mods you are using. Most server management tools provide options to schedule and automate updates. Set a schedule for updates to run during off-peak hours to minimize disruption to players.
Server Management Tools for Automation
Site24x7 IT Automation Tool: Simplify repetitive tasks and boost efficiency.
McMyAdmin: Popular Minecraft server tool with automated backups, updates, and restarts.
Multicraft: Streamline maintenance tasks, including backups and updates.
Plesk: Comprehensive platform for automated backups, updates, and security.
#5. Ensuring Server Uptime
Proactive Monitoring: Utilize server monitoring tools to track system-level services for availability and response time, ensuring early detection of downtime issues.
Careful Planning: Schedule server maintenance during off-peak hours and notify users in advance to minimize disruptions.
Preventive Maintenance: Regularly perform tasks like software updates, hardware replacement, and server cleaning to prevent downtime.
Management and Monitoring Tools: Use these tools to identify and address uptime-related problems and assess the impact of downtime on critical services.
Security Enhancement: Implement security measures, including anti-malware products, firewalls, and audits, to safeguard against interruptions from attackers.
Quality Hardware: Invest in high-quality hardware to reduce downtime caused by hardware failures.
Regular Data Backups: Schedule regular server data backups using backup software or tools to prevent data loss in case of crashes or issues.
Server Management Plugins and Tools for Automation
ManageEngine OpManager: Monitor system-level services for availability and response time, ensuring uninterrupted server services.
eG Innovations: Proactively detect downtime issues with eG Innovations’ server uptime monitoring.
Pingdom: Gain insights into website uptime statistics through Pingdom’s server uptime monitoring, presented in visual reports.
#6. Common Minecraft Server Issues and Solutions
Minecraft server problems like lag, crashes, and errors can be tackled by adjusting settings, monitoring server health, and keeping software up-to-date.
To address lag, reduce player numbers, upgrade resources, or optimize settings.
For crashes, investigate logs, update software/plugins, or replace faulty hardware.
Server errors can be fixed by checking logs, updating software/plugins, or tweaking settings.
Utilize server management tools for smoother maintenance and seek help from Minecraft Forum, ReliableSite for hardware, and the Minecraft Help Center for troubleshooting.
Conclusion
In the dynamic world of Minecraft, having a server that’s always running is the key to unforgettable adventures. By addressing common issues with proactive measures, you can ensure a smooth and uninterrupted gameplay experience for you and your fellow gamers.
Remember, the journey doesn’t end here. The use of server management tools can make server upkeep a breeze.


