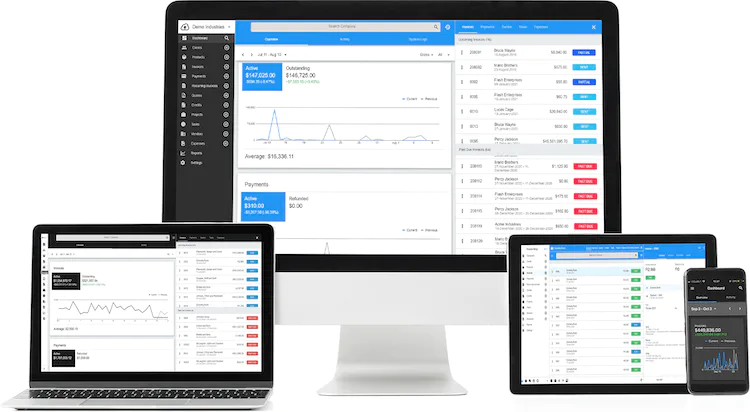
If you would like to install Invoice Ninja using Docker, you are at the right place.
Invoice Ninja is a helpful tool for keeping track of your invoices and time, and it’s open-source, meaning it’s free to use and can be customized.
It’s built using a technology called Laravel, which makes it work smoothly.
What is Docker
Docker is like a toolbox for developers.
It helps them create, send, and run applications in special containers.
These containers are like little packages that are easy to carry around. They can work on any computer that knows about Docker.
Imagine you have a special set of Legos. These Legos only fit together in a certain way, and they can work on any Lego table.
Docker is like those Legos. It makes sure your applications always work the same way, no matter where you put them.
Now, when we talk about Invoice Ninja, Docker makes things super easy. It’s like having a magical wand.
With Docker, you can install Invoice Ninja without any headaches. There’s a special Invoice Ninja box on Docker Hub, and you can open it up with something called Docker Compose.
Docker Compose is like a wizard’s spell book for running many things at once. It’s great because it makes setting up Invoice Ninja really simple.
Why Use Docker for Invoice Ninja?
Using Docker to install Invoice Ninja is a good idea because it makes the whole process simpler. Docker is like a magic box that helps you set up Invoice Ninja without any fuss.
Here’s why it’s a smart choice:
1. Easier Installation
Docker makes getting Invoice Ninja up and running a piece of cake. It’s much simpler than trying to install it manually.
2. Hassle-Free Management
With Docker, you can easily manage Invoice Ninja. It’s like having a remote control for your app. You can start, stop, and update it with just a few clicks.
3. App in a Box
Docker puts Invoice Ninja inside a container. Think of this container as a virtual box where the app lives. This container can be moved around or copied to other computers easily.
4. No Compatibility Headaches
Sometimes, apps don’t work well together because they need different things to run. Docker gives Invoice Ninja everything it needs, so it works smoothly without any issues.
5. Troubleshooting Made Simple
If something goes wrong, Docker makes it much easier to figure out what’s happening. It’s like having a detective on the case, finding clues to solve any problems.
Using Docker with Invoice Ninja is like having a helpful assistant that sets everything up for you, keeps things running smoothly, and makes sure there are no problems along the way. It’s a great choice for anyone who wants to make their invoicing and time-tracking tasks a breeze!
Getting Ready for Invoice Ninja with Docker
Before you jump into installing Invoice Ninja with Docker, make sure you’ve got a few things lined up:
1. Docker Installed
First off, you need to have Docker installed on your computer.
If you’re wondering what Docker is, it’s like a magic box that holds all the stuff you need to run Invoice Ninja.
You can get Docker by following the instructions on their website. For folks using Windows and Mac, there’s a handy-dandy installer called Docker Desktop.
If you’re a Linux champ, no worries; you can find instructions for your specific Linux flavor on the Docker website too.
2. Docker Know-How
It’s not magic, though. You’ll need to have some basic know-how about Docker.
Think of it like knowing how to ride a bike before you hit the road. If you’re new to Docker, maybe spend a little time getting familiar with some Docker commands and concepts.
It’ll make your Invoice Ninja journey much smoother.
3. Command Line Access
This one’s a must. You need access to the Command Line Interface, or CLI for short. It’s like the steering wheel for your Docker ship.
Now, here’s a neat tip before you dive in: It’s a good idea to create a special key for your Invoice Ninja application. You can do this by typing in `php artisan key:generate –show` when you’re inside the Invoice Ninja container. It’s like having a secret key to unlock all the cool features.
Having some Docker know-how and a comfy seat at the CLI is key to getting Invoice Ninja up and running with Docker.
Oh, and don’t forget to make sure your computer meets the minimum requirements for a smooth Invoice Ninja sailing. That way, everything will work just right, and you’ll be zipping through your invoices in no time!
Simple Guide to Installing Invoice Ninja with Docker
Follow these easy steps to install Invoice Ninja using Docker:
Step 1: Get the Invoice Ninja Docker Image
Start by getting the official Invoice Ninja Docker image from Docker Hub. You can do this by running the command `docker pull invoiceninja/invoiceninja`.
Step 2: Set Up a Docker Compose YAML File
Create a special folder for your Invoice Ninja installation. Open your command line tool (the thing where you type commands) and go into that folder.
In this folder, make a new file called `docker-compose.yml` and put in this code:
version: ‘3’
services:
app:
image: invoiceninja/invoiceninja
ports:
– “8000:8000”
volumes:
– ./storage:/var/www/app/storage
– ./public:/var/www/app/public
environment:
– APP_ENV=production
– APP_DEBUG=false
– APP_URL=http://localhost:8000
– APP_KEY=YOUR_APP_KEY
– DB_HOST=db
– DB_DATABASE=ninja
– DB_USERNAME=ninja
– DB_PASSWORD=ninja
depends_on:
– db
restart: always
db:
image: mariadb
environment:
– MYSQL_ROOT_PASSWORD=root
– MYSQL_DATABASE=ninja
– MYSQL_USER=ninja
– MYSQL_PASSWORD=ninja
volumes:
– ./db:/var/lib/mysql
restart: always
Step 3: Personalize Your Settings
Inside the YAML file, you can change some important settings. Replace `YOUR_APP_KEY` with a real application key. To get one, run `php artisan key:generate –show` in the Invoice Ninja container.
Step 4: Launch the Invoice Ninja Box
Start up your Invoice Ninja container using Docker Compose. Just type `docker-compose up -d`.
You can then use your web browser to visit `http://localhost:8000` and access Invoice Ninja.
Alternative way to Install Invoice Ninja using Docker
1. Install Docker on your system if you haven’t already. You can find detailed instructions on how to do this on the Docker website.
2. Clone the Invoice Ninja Docker repository from GitHub using the following command:
git clone https://github.com/invoiceninja/dockerfiles.git
3. Navigate to the cloned repository and open the docker-compose.yml file in a text editor.
4. Edit the APP_URL variable to match the URL you will use to access Invoice Ninja.
5. Save the changes to the ‘docker-compose.yml’ file.
6. Run the following command to start the Invoice Ninja Docker container:
docker-compose up -d
7. Wait for the container to start up. You can check the status of the container using the following command:
docker-compose ps
8. Once the container is running, you can access Invoice Ninja by navigating to the URL you specified in the APP_URL variable.
Getting to Invoice Ninja on the Web
Once the container is running, simply go to `http://localhost:8000` in your web browser to use Invoice Ninja.
More Settings and Care
If you want to do extra stuff like setting up a reverse proxy or adding SSL, you should check out the Invoice Ninja documentation and community help.
For making backups and bringing back your Invoice Ninja data, you can use the `docker cp` command. Copy the data to a safe place and restore it when needed.
Conclusion
Setting up Invoice Ninja with Docker is a pretty straightforward task. You can get it done in just a few steps.
Using Docker for Invoice Ninja has some good points. It makes deploying and managing the software easy because it uses something called containers.
It also gives you a steady place to run the app, and it makes configuring and customizing it simpler by using Docker Compose YAML files.
If you want to learn more about how to set up fancy stuff like a reverse proxy or secure your Invoice Ninja with SSL (that’s like adding armor to your game character), you can find all that in the Invoice Ninja documentation and from other people who use Invoice Ninja.
So, to sum it all up, using Docker to set up Invoice Ninja is a smart move. It makes things easier and gives you lots of ways to make it just right for you.
So, don’t be shy; go ahead and explore Invoice Ninja’s features and make it work the way you want it to!


