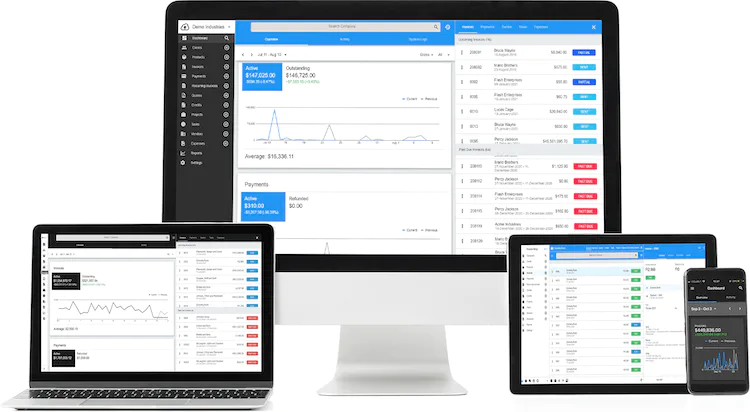
Invoice Ninja is a free tool made for small and medium-sized companies as well as freelancers. With it, you can easily make and send invoices, keep track of your expenses, handle vendors, and make work easier by automating tasks.
There are two ways you can use Invoice Ninja. First, you can get it as a self-hosted application. This means you download it for free and install it on your computer. It works with some special computer setups like LAMP stack on Ubuntu, Debian, CentOS, or Arch Linux. You can also use it with either Apache or Nginx web servers.
The second option is to use it as a hosted application on the Invoice Ninja website. This means you don’t have to worry about installing anything, you just use it directly on their website.
Updating Invoice Ninja
Updating Invoice Ninja is important to keep your business running smoothly. Follow these steps to update it:
Step 1: Back Up Your Database
Before diving into the update, make sure you back up your database. This important step ensures you won’t lose any valuable customer information or invoices. To do this, you can use a tool called mysqldump. It’s like creating a safety net for your data.
Step 2: Check the Documentation
Every software update comes with its own set of instructions and requirements. Check the official Invoice Ninja documentation for specific guidelines on updating to the latest version of the application. This will help you avoid any unexpected hiccups during the process.
Step 3: Download the Latest Version
Now, it’s time to get your hands on the latest version of Invoice Ninja. You can easily find it on the official website or the Github repository. Just click the download button and let the magic begin.
Step 4: Copy Over the Latest Code
Updating the application is as simple as copying over the latest code. Don’t worry about overwriting any files; the important configuration files, like the one for MySQL connections, are usually stored separately. This step ensures you have all the newest features and improvements.
Step 5: Run the Self-Updater (Self-Hosted Version Only)
If you’re using the self-hosted version of Invoice Ninja, you have the luxury of using the self-updater. This nifty tool lets you pull the latest release from the Github repository. It then extracts and updates all the necessary system files for you. It’s like having your own personal update assistant.
Step 6: Test the Application
After the update, it’s crucial to test Invoice Ninja to make sure everything is running smoothly. Check to see if your data is still there, and that all the features and functions are working as they should. This final step ensures that your updated Invoice Ninja is ready to serve you and your customers seamlessly.
That’s it! By following these steps, you can keep your Invoice Ninja up-to-date and ensure it continues to meet your invoicing needs.
Read also: Invoice Ninja Remove Branding. What You Need To do.
Benefits of Updating Invoice Ninja
Invoice Ninja is a useful tool for businesses, and keeping it up-to-date can bring several advantages. Here’s why you should consider updating it:
1. Security
Keeping Invoice Ninja up to date is like putting a lock on your diary. It makes sure that any holes in the software that hackers might sneak through are fixed. So, your data stays safe and sound.
2. Fixing Bugs
Think of it like repairing a bicycle. Sometimes, Invoice Ninja might not work as smoothly as it should because of bugs or glitches. Updating it is like getting those issues fixed, so everything runs super smoothly.
3. New Features
Imagine your favorite video game getting an update with cool new levels and powers. Updating Invoice Ninja is a bit like that. It adds new things to make using it even better. You’ll be able to manage your invoices and expenses like a pro!
4. Compatibility
Think of Invoice Ninja as a team player. It needs to work well with other software, like PHP and MySQL. Updating it ensures that it can keep up with the latest versions of these teammates. No one gets left behind!
5. Performance
Have you ever noticed that your computer gets slower over time? Well, the same can happen to Invoice Ninja if you don’t update it. Updating it can make it faster and more responsive, like a race car with a fresh coat of paint.
So, in a nutshell, updating Invoice Ninja is like giving it a makeover – it looks better, works better, and keeps your stuff safe. Don’t forget to hit that update button!
Troubleshooting Tips for Invoice Ninja Updates
If you’re facing problems while updating your Invoice Ninja software, you can follow these steps to help you out:
Step 1: Check the Official Documentation
Start by looking at the official Invoice Ninja documentation. It’s like a guidebook that might have the exact answers to the issue you’re having.
Step 2: Visit the Invoice Ninja Community Forum
Sometimes, others have faced the same problem as you. Go to the Invoice Ninja community forum to see if there are any posts about your issue. You might find solutions or tricks from people who had similar troubles.
Step 3: Consider a Backup
If the issue is still not fixed, don’t worry. You can go back to an earlier version of Invoice Ninja by restoring from a backup. This means your software will be like it was before the update.
Step 4: Ask for Help
If you’re stuck and none of the above steps work, it’s time to ask for help. You can talk to others in the Invoice Ninja community, or you can get in touch with an expert who knows all about Invoice Ninja. They can help you find the right solution for your specific problem.
Remember, you’re not alone in this. Many people use Invoice Ninja, and there are resources available to make sure your invoicing goes smoothly!
Related: Invoice Ninja Auto Bill: Say Goodbye to Manual Invoicing
Backing Up Your Data Before Updating Invoice Ninja
To make sure your information is safe and sound before updating Invoice Ninja, follow these easy steps:
1. Create a Backup of Your Database
Start by creating a backup of your database. This is like making a photocopy of all your important customer data and invoices. To do this, you can use a tool called “mysqldump.” This helps prevent any loss of valuable information.
2. Backup Your Invoice Ninja Home Folder
Next, don’t forget to back up your Invoice Ninja root directory. Think of this as taking a picture of all the important files in Invoice Ninja. This way, you’ll have a copy in case anything goes wrong.
3. Get the Latest Version
Before you start the update, make sure you have the latest version of Invoice Ninja. You can download it from the Invoice Ninja website. It’s like getting a brand-new and improved version of a favorite game or app.
4. Copy Everything Over
Now, copy all the files from the new version and put them where your old Invoice Ninja was. Don’t worry about replacing the old files; it won’t mess up your settings like MySQL.
5. Check Everything
Once you’ve updated, take a few minutes to check that everything is working right. Make sure your invoices, payments, and other data are all in their proper places. It’s like making sure all the pieces of a puzzle fit together perfectly.
Read also: Invoice Ninja vs. FreshBooks: The Simple Head-To-Head Comparison
Final Thoughts on Updating Invoice Ninja
Updating Invoice Ninja can sometimes be a bit tricky, but it’s an essential task to keep your invoicing software running smoothly.
By following the steps mentioned earlier, and also by checking the official documentation, seeking help from the community forum, considering backups, and reaching out to experts when needed, you can ensure a successful and hassle-free update process.
Remember, you’re not alone on this journey, and there are resources and support available to help you every step of the way. So, go ahead and keep your Invoice Ninja up-to-date, and you’ll be on your way to efficient and error-free invoicing in no time!


