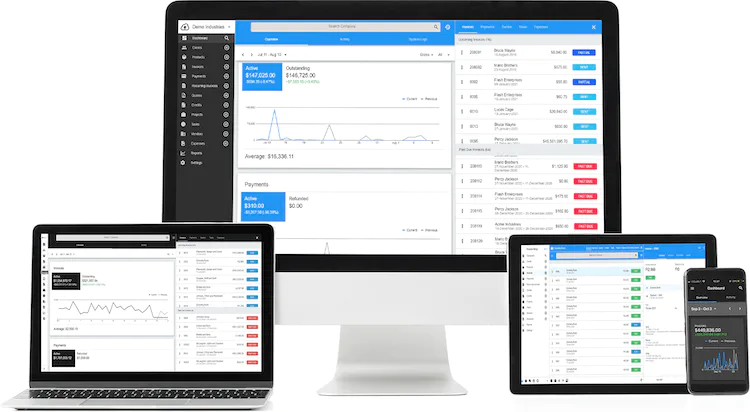
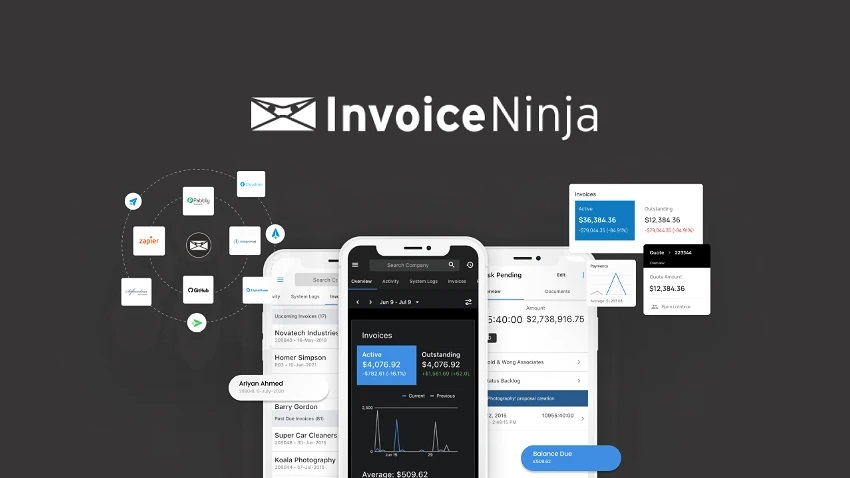
Invoice Ninja is a free open-source invoice and billing software built with PHP and MySQL. It allows businesses to create professional looking invoices, track payments and manage clients and products.
XAMPP on the other hand is a popular Apache distribution containing MySQL, PHP and Perl support. It allows you to set up a local web server on your own PC for testing PHP applications without needing an external hosting provider.
Self-hosting Invoice Ninja using XAMPP is a convenient way to test and use the software locally before deploying online. As both Invoice Ninja and XAMPP are free and open source, this is a budget friendly invoicing solution for small businesses.
Some key benefits of running Invoice Ninja on XAMPP include:
1. Quick and easy installation and setup.
2. Ability to fully test and evaluate the software.
3. Local data backup and control.
4. Avoid recurring SaaS fees of online invoice software.
5. Step towards self-hosting Invoice Ninja on own server in future.
In this guide, we go through step-by-step installation, configuration and usage instructions for Invoice Ninja on XAMPP for Windows.
Benefits Of Using Invoice Ninja Self-Hosted On Xampp
Here are some of the key advantages of using Invoice Ninja self-hosted on XAMPP
1. Quick and Easy Installation
XAMPP provides a pre-configured Apache/MySQL/PHP stack allowing simple installation and launching of Invoice Ninja with a few clicks. There is no need to manually install the LAMP components.
The installer takes care of all dependencies and initial configuration. You can be up and running with Invoice Ninja in as little as 5 minutes after installing XAMPP.
2. Test Locally Before Going Live
Self-hosting on your own PC enables you to fully evaluate Invoice Ninja and customize it before deploying online. You can take your time testing workflows and features using dummy data without impacting live operations.
Testing locally helps identify any compatibility issues between Invoice Ninja, your hardware environment, regional settings etc. This improves readiness when you eventually install on a production server.
3. Local Backup and Control
With Invoice Ninja data stored locally on your machine, you have full control and access. You can easily backup the MySQL database and invoice file attachments in case of errors or before migration.
The data resides safely on your PC protected by your security measures. This offers more control compared to cloud-hosted invoice software where data is on vendor servers.
4. Avoid Recurring Subscription Fees
Self-hosted open source software means no recurring monthly or annual subscription fees involved. This helps lower the cost of an invoicing system for small businesses and freelancers.
Although you miss out on automatic updates and technical support, the open source community provides guides and forum assistance for common issues.
5. Step Towards Online Self-Hosting
Testing locally helps you learn how to install, configure and manage Invoice Ninja. These skills will prove useful for eventual self-hosting on a public server or VPS rather than relying on paid SaaS models.
You also have the option to migrate your local XAMPP database and files seamlessly to the production server when ready to go live.
In summary, self-hosting Invoice Ninja on XAMPP enables simple testing, control over data, avoidance of subscriptions and practice towards online self-hosted deployment.
Installation Guide For Invoice Ninja On Xampp
Here is a step-by-step guide to installing Invoice Ninja on XAMPP on Windows:
Step 1 – Install XAMPP
First, download the latest XAMPP installer for Windows from https://www.apachefriends.org/download.html
Run the installer .exe and accept the defaults to install XAMPP under C:\xampp. This will install Apache, MySQL, PHP and other components.
Step 2 – Start XAMPP
Browse to the XAMPP installation folder under C:\xampp\
Run xampp-control.exe. This will launch the XAMPP control panel.
Start the Apache and MySQL modules which will initialize the servers.
Step 3 – Download Invoice Ninja
Go to the Invoice Ninja project page on GitHub https://github.com/invoiceninja/invoiceninja
On the right sidebar, click the green “Code” button then choose “Download ZIP” option.
Save the zip file containing the Invoice Ninja v5 source code on your PC.
Step 4 – Extract Files
Extract the downloaded invoiceninja-5-master.zip file.
This will create a folder invoiceninja-5-master containing the PHP app code and assets.
Step 5 – Copy Files to XAMPP Web Root
Copy the extracted invoiceninja-5-master folder contents to XAMPP’s htdocs folder at C:\xampp\htdocs\.
This deploys Invoice Ninja into the web root where Apache serves files.
Step 6 – Create Database
Open a browser and access phpMyAdmin which you can find in your cPanel.
Login with username root. No password is needed by default.
Click the Databases tab and create a new MySQL database named ninja.
Step 7 – Install Invoice Ninja
Access the Invoice Ninja installer on your browser.
Select the language, timezone, currency and create a ninja database.
Create the initial admin user account email and password.
The installer will initialize the database, configs and complete setup.
The application is now ready to use on your local XAMPP server.
Step 8 – Login to Dashboard
Visit https://app.invoicing.co/#/login to open the Invoice Ninja dashboard.
Enter the admin email and password created during install.
The dashboard provides access to all invoicing functions and configuration options.
With these simple steps, you can get Invoice Ninja running locally using XAMPP’s Apache and MySQL in just a few minutes.
Configuring Invoice Ninja Settings And Environment
Once Invoice Ninja is installed on XAMPP, you may need to configure some settings for your specific environment and requirements:
1. Set Timezone
i). Go to Settings > Company Details
ii). Scroll down and set your Timezone
iii). This controls date/time display in invoices
2. Add Your Logo
i). Go to Settings > Company Details
ii). Upload your logo image under Company Logo
iii). It will appear on invoices and portal pages
3. Customize Invoice Design
i). Go to Settings > Invoice Design
ii). Choose colors, font, add logo position, etc
iii). Preview changes in real-time
4. Set Invoice Defaults
i). Go to Settings > Invoice Settings
ii). Set default values for:
- Invoice prefix
- Number counter
- Terms
- Footer etc
iii). Determine what’s pre-filled on new invoices
5. Configure Taxes
i). Go to Settings > Tax Rates
ii). Click “Create Tax Rate”
iii). Enter tax name, rate %, region applicability etc
iv). Used to calculate taxes on invoices
6. Set Client Defaults
i). Go to Settings > Client Settings
ii). Set new client defaults for:
- Currency
- Language
- Payment terms
iii). Enable portal password etc
7. Email Configuration
i). Go to Settings > Email Settings
ii). Configure mail driver, host, encryption etc
iii). Test email sending works correctly
8. Multi-User Access
i). Go to Settings > Users
ii). Click “Create New User”
iii). Set user roles like: admin, user, client viewer
9. API Tokens
i). Go to Settings > API Tokens
ii). Create personal and public API tokens
iii). Enables using Invoice Ninja API
Take time to initialize settings aligned to your business and customization needs before generating live invoices.
Creating Invoices, Clients And Products In Invoice Ninja
Here are some tips on using the core invoicing capabilities in Invoice Ninja running on your local XAMPP server:
1. Create Clients
i). Go to Clients menu
ii). Click “Create New Client”
iii). Enter client name, contact, email, currency, payment terms etc
iv). Custom fields can also be added
2. Add Products or Services
i). Go to Products menu
ii). Click “Create New Product”
iii). Input product name, description, price/rate, tax etc
iv). Can make products active/inactive
3. Configure Invoices
i). Go to Invoices > Create New Invoice
ii). Select client
iii). Add products/services or custom line items
iv). Set invoice number, date, due date, discount etc
4. Adjust Invoice Design
i). Click “Customize Design” on invoice preview
ii). Adjust colors, fonts, add logo, footer text etc
iii). Changes apply only to this invoice
5. Preview and Send Invoice
i). Review the invoice and make final adjustments
ii). Click “Preview” to view formatted invoice
iii). Click “Send Invoice” to email to client
6. Receive Payments
i). Go to Invoices > click invoice > Make Payment
ii). Enter amount received as full/partial payment
iii). Handles refunds also
iv). Email payment receipt optional
7. Recurring Invoices
i). Go to Recurring Invoices > Create Recurring Invoice
ii). Select client, frequency, add line items
iii). Automatic reminders and creation per schedule
8. Reports and Stats
i). Dashboards show real-time totals and graphical insights
ii).Run detailed reports on payments, expenses, clients etc
Take time to test the end-to-end invoicing workflow using dummy data on your local XAMPP setup before migrating to production.
Backing Up And Troubleshooting Invoice Ninja On Xampp
When running Invoice Ninja on your local XAMPP server, it is important to implement backups and have strategies to troubleshoot any issues that may arise:
Backup MySQL Database
The Invoice Ninja MySQL database contains all your critical data – clients, invoices, products, transactions etc. This should be backed up periodically.
Within phpMyAdmin you can click the Export tab to export the full ninja database as a SQL file. Store the .sql file as a backup.
For larger data, enable MySQL binary logging and take incremental backups using a tool like mysqldump.
Backup Invoice Files
All attached invoice PDFs and sample files are stored under \xampp\htdocs\invoiceninja\storage\logs
You should backup this directory regularly to preserve invoice files. Use file archiving software like 7-zip or WinRAR.
Configure automated backups using scheduling tools like Windows Task Scheduler for convenience.
Security and Access Control
Since Invoice Ninja data is on your local system, ensure strong Windows account passwords and restrict system access.
Grant selective Invoice Ninja user role permissions. Disable guest accounts on XAMPP which are insecure.
Use firewalls and keep OS and software updated to protect against malware and unauthorized access.
Troubleshoot Errors
If issues arise, first check the \xampp\htdocs\invoiceninja\storage\logs folder for verbose PHP error logs.
The error messages provide clues on causes – app bugs, faulty edits, database connectivity failures etc.
Search community forums like Reddit to find fixes for common errors. Sample data can also help reproduce and isolate bugs.
Testing in Copies
Before upgrading Invoice Ninja or editing critical files, make a copy of the whole invoiceninja folder as backup.
Test any major changes in the copy first before applying across your main site to avoid breaking things.
With robust backups, isolation of errors and testing prior to rollout, you can confidently experiment with customizations knowing you have fallbacks.
Conclusion And Key Takeaways
Invoice Ninja is a free open source invoicing app that can be self-hosted using XAMPP for local testing.
Benefits include quick setup, ability to fully test features with dummy data and avoid paid SaaS subscriptions.
Download XAMPP and Invoice Ninja source, then install by copying files into the XAMPP web root and database setup.
Configure settings like taxes, email, invoices and user access for your specific business requirements.
Create clients, products and invoices, send recurring invoices and generate various reports using the application.
Take regular backups of the database and invoice files. Troubleshoot issues by checking logs and community forums.
Overall, self-hosting Invoice Ninja on XAMPP provides a handy way for businesses to evaluate the software before deploying online.
Read also: No. 1 Guide To Invoice Ninja Logo Size


