Ever launched a game or live stream, only for everything to crash right when players join?
You’re not alone.
Developers and streamers face this every day. Lag spikes, dropped matches, or random downtime ruin hours of work and drive players away. You fix your code, upgrade the engine, tweak your settings… yet the real issue often hides deeper, inside your game server security setup.
Without the right protection, even a small distributed denial of service (DDoS) attack or a missed backup can shut you down. And when that happens, your game reliability, uptime, and player trust go with it.
That’s why we have this guide, to help you build a resilient, secure, and self-healing game environment from the ground up. Whether you’re hosting your own Minecraft server, managing dedicated machines for eSports, or streaming to thousands, this guide breaks everything down step by step.
Here’s what you’ll learn:
- Understanding the Basics of Game Server Security
- Assessing Risks and Setting Recovery Goals
- Designing for Redundancy and Fault Tolerance
- Protecting Against DDoS Attacks
- Automating Backups and Replication
- Enabling Automated Failover and Recovery
- Setting Up Real-Time Monitoring and Alerts
- Securing Access and Encrypting Player Data
- Performing Rolling Updates with Zero Downtime
- Running Disaster Recovery Tests
- Respond, Review, and Improve
- Checking Cost vs. Reliability
- Keeping Improving Continuously
Let’s start with the foundation, understanding what game server security means and how to build it right from day one.
Step 1: The Basics of Game Server Security

Before you build protection, know what you’re securing. A game server runs real-time connections between players and back-end services like a matchmaker, authentication, and databases. It must stay online even when traffic spikes or attackers strike.
Good game server security focuses on three things:
- Strong DDoS mitigation that can handle high load, aim for DDoS throughput around 100 Gbps to 1 Tbps and Packets-per-second (PPS) capacity of 10 M PPS.
- Reliable backups such as snapshots, incremental, or full copies to keep player progress safe.
- Smart replication or multi-region replication so gameplay continues even if one data center fails.
Each of these helps you meet your RPO (Recovery Point Objective) and RTO (Recovery Time Objective) goals.
- A good setup keeps RPO at 5 minutes and RTO at 10 minutes, so players experience little data loss and downtime.
- Always match that with SLA / uptime guarantees like 99.9% or 99.99% for reliability.
Keep it simple: protect connections, copy data, and recover fast.
Step 2: Assess Risks and Set Recovery Goals
Before deploying your game server, identify what could fail. Look at your hardware: CPU / RAM per instance = 8 vCPU / 32 GB RAM.
Check network bandwidth = 1 Gbps / 10 Gbps.
Then ask:
- How long can the server stay down before players quit?
- How much data loss is acceptable (RPO)?
- How quickly should it recover (RTO)?
Write these in a Disaster Recovery Plan (DRP). It defines how you react when things go wrong.
For example:
- Error budget = 43.8 minutes/month gives you clear limits for a 99.9 % SLA.
- These small numbers help track uptime, downtime, and incident frequency.
When you measure early, you avoid big surprises later. That’s what makes recovery real, not theoretical.
Step 3: Design for Redundancy and Fault Tolerance
Now, build a gaming or streaming system that heals itself. A reliable setup runs smoothly even when parts break.
- Start with redundancy and fault tolerance in every layer.
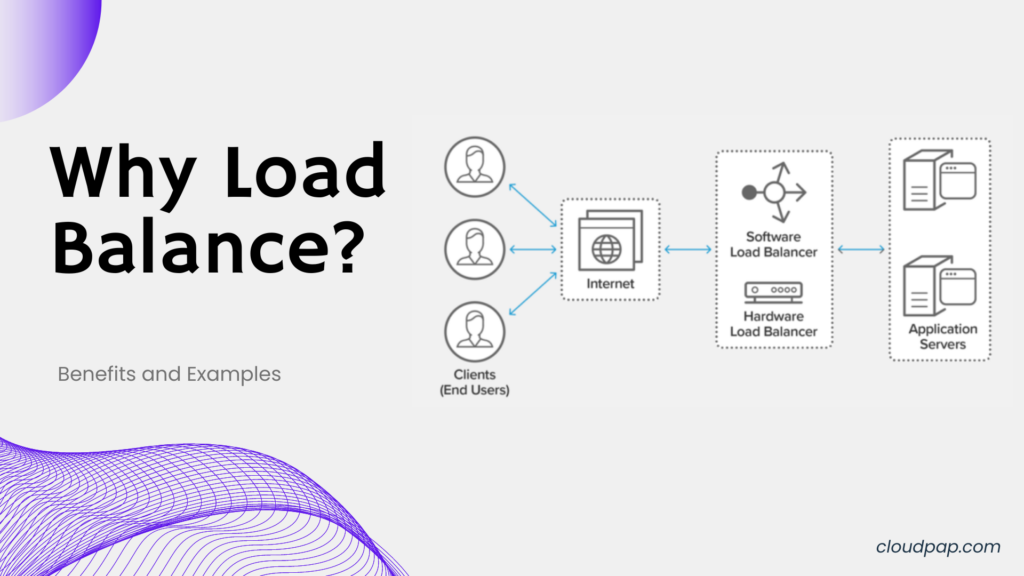
- Use a Load balancer / reverse proxy to distribute traffic.
- Add a CDN (Content Delivery Network) or CDN + edge caching to keep latency low so players connect to the nearest node.
- Next, use a multi-region replication strategy for databases and files.
- Store data in persistent storage / persistent volumes, for example, NVMe block storage with Disk type & IOPS = NVMe, 100k IOPS.
- Run health checks/readiness probes to monitor node status. If one node fails, automated failover routes users to another region within a Failover TTL of 30 to 60 seconds.
These small automations mean your game server won’t crash when one region goes dark. It simply reroutes traffic and stays alive.
Step 4: Protect Against DDoS Attacks
Distributed denial of service (DDoS) attacks are the top threat to game server security. They flood your system with fake traffic until players can’t connect.
In 2025 alone, over 20.5 million DDoS attacks were recorded globally, many targeting gaming platforms.
Follow DDoS protection best practices step by step:
- Use a firewall / WAF (Web Application Firewall): It blocks malicious traffic and filters known attack patterns.
- Enable rate limiting and connection throttling with rate limit headers/connection limits to stop spammers from flooding your ports.
- Route traffic through a BGP Anycast/scrubbing network that absorbs large attacks across multiple nodes.
- Add a load balancer / reverse proxy to manage incoming requests evenly.
Your DDoS protection should detect floods in < 60 seconds (Detection time) and mitigate them in < 5 minutes (Mitigation time). That’s the real benchmark used by providers who promise 1 Tbps throughput handling.
Combine this with real-time monitoring and alerts so your team sees the attack as it happens.
If you use global networks like CloudPap, ensure their infrastructure supports large-scale filtering and automatic rerouting under pressure.
Step 5: Automate Backups and Replication
Even the best protection fails, so data safety depends on continuous and incremental backups.
Automate your game server security process:
- Backup frequency: every 15 minutes, hourly, or daily, depending on active users.
- Retention period: 7 / 30 / 90 days, depending on compliance needs.
- Snapshot size: 20 GB / 200 GB, based on the instance size.
After each backup, verify it works. Run integrity checks and backup verification, because broken backups are no backups. Set a goal of time to restore (full DB) = 30 minutes.
Then, use replication / multi-region replication so every change is copied in real time to another region. If one region fails, automated failover and recovery bring players back online within seconds.
This combination, backups + replication, keeps your data safe, your uptime steady, and your players happy.
Step 6: Enable Automated Failover and Recovery
Manual recovery wastes time. You need automated failover and recovery that detects and fixes issues without human help.
Use orchestration (Kubernetes, Docker) to manage containers. These platforms handle scaling, restarting, and routing automatically.
Set health checks/readiness probes on every service. When one fails, the orchestrator reroutes traffic to healthy instances in seconds. Keep Failover TTL = 30s / 60s for fast switching.
For safer updates, use a blue-green deployment strategy or a canary release rollout:
- Blue-green runs two environments (old + new).
- Canary releases updates to a few players first.
Both reduce downtime during updates, achieving rolling updates with zero downtime.
Store your Disaster Recovery Plan (DRP) clearly. List your failover process, team contacts, and disaster recovery test plan schedule. Test every few months to ensure you meet RPO and RTO targets.
When everything is automated, downtime feels invisible.
Step 7: Set Up Real-Time Monitoring and Alerts
If you can’t monitor it, you can’t fix it. Real-time monitoring and alerts are your eyes and ears for every game server process, from CPU load to network health.
Use trusted monitoring & alerting tools such as Prometheus, Grafana, and Datadog. These platforms help you detect, alert, and respond before players even notice problems.
Start with clear thresholds:
- Alert thresholds, CPU > 85% for 5m, packet loss > 2%.
- Network bandwidth, 1 Gbps / 10 Gbps target.
- SLA / uptime guarantees, 99.9% or 99.99% depending on your service level.
These numbers help you track whether your game server security setup is performing as expected.
Tie alerts to your incident response/post-mortem system so you always document, patch, and improve after each issue.
Also include health checks/readiness probes that automatically restart or isolate unhealthy instances. Combine this with automated failover and recovery so players never feel downtime.
Step 8: Secure Access and Encrypt Player Data
Even the most protected network fails if someone gets unauthorized access. That’s why you must strengthen authentication & access control (SSH keys, IAM).
Here’s how to keep access clean and safe:
- Disable password logins; only allow SSH key-based access.
- Rotate (keys/credentials) every month or after team changes.
- Restrict access by role using IAM policies, developers, testers, admins.
Next, apply encryption at rest & in transit (TLS) for every database, file system, and player connection. This ensures that even if attackers reach your storage, they can’t read data.
Add another layer of defense with a Firewall / WAF (Web Application Firewall) that blocks unauthorized IPs and open ports. Test your firewall rules monthly and audit your configuration to ensure no gaps exist.
Document everything, access logs, key rotations, audit reports, in your Disaster Recovery Plan (DRP). This makes your recovery faster during incidents.
Security isn’t just about blocking threats: It’s about managing trust.
Step 9: Perform Rolling Updates with Zero Downtime
No player likes downtime, even for updates. With rolling updates / blue-green deploys / canary releases, you can deploy new code without stopping gameplay.
Here’s how to deploy new code to your game without stopping gameplay:
- Deploy a new version (green) beside the current one (blue).
- Route a small portion of traffic to the new build.
- Watch performance via real-time monitoring and alerts.
- If stable, scale up and route all traffic there.
- If errors appear, roll back instantly.
This method maintains redundancy and fault tolerance, ensuring your uptime remains within your SLA / uptime guarantees (99.99%).
Always test health checks/readiness probes during updates to confirm smooth transitions. Pair updates with persistent storage / persistent volumes (NVMe, block storage) so live data remains untouched.
In large systems, this deployment strategy often uses orchestration (Kubernetes, Docker) for speed and consistency.
And this will be your outcome: Seamless upgrades, no player dropouts, and a stronger reputation for reliability.
Step 10: Run Disaster Recovery Tests
Game backups are useless if you never test them.
- Build a full disaster recovery test plan (DRP) into your monthly tasks.
- Simulate data loss and confirm that the restore process works under your RPO (Recovery Point Objective) and RTO (Recovery Time Objective) targets.
- Measure your Time to restore (full DB). Aim for 30 minutes or less.
- Validate every snapshot and log the results.
- Document lessons learned and update your DRP each time.
This practice proves how real your backup system is. Regular integrity checks and backup verification prevent silent corruption that could cost days of player progress.
Testing your game failover process ensures that your game server truly recovers when it counts.
Step 11: Respond, Review, and Improve
When incidents happen, speed and clarity matter most.
Use a clear incident response/post-mortem workflow.
- Detects the issue, maybe a network spike, failed node, or bad deploy.
- Isolate the cause and mitigate with temporary fixes.
- Restore service using backups or automated failover.
- Write a post-mortem explaining what failed and how to prevent it.
Always document timelines, affected systems, and future actions. Update your Disaster Recovery Plan (DRP) and error budget after every event. This creates a feedback loop that builds long-term reliability into your game server security.
Step 12: Check Cost vs. Reliability
Game server security can get expensive if unmanaged. Use clear performance metrics to balance cost and protection.
- Review CPU / RAM per instance (e.g., 8 vCPU / 32 GB RAM) and adjust based on usage.
- Analyze network bandwidth logs to reduce unnecessary traffic.
- Monitor snapshot size and backup frequency to optimize storage costs.
- Use orchestration tools like Kubernetes or Docker for auto-scaling under load.
This keeps your system efficient without losing reliability. Smart rate limiting, firewall / WAF (Web Application Firewall) configurations, and load balancer tuning make performance predictable, even during peak player hours.
Step 14: Keep Improving Continuously
Game servers evolve fast. Schedule regular audits to test, audit, and document progress.
Adjust backup retention policy and alert thresholds as traffic grows.
Aim to cut detection time to < 60 seconds and mitigation time to < 5 minutes.
Automate what you can, from failover to key rotation.
Keep your RPO and RTO targets low, and your SLA / uptime guarantees high.
When every second counts, even small health checks, readiness probes, or extra replicate nodes make a big difference.
Continuous improvement is the real backbone of reliability.
Common Game Server Security Mistakes Developers and Streamers Make
Avoid these game server security errors that quietly destroy uptime and player trust:
- Forgetting to verify backups or skipping integrity checks.
- Ignoring rate limiting and firewall / WAF rules.
- No real-time monitoring and alerts using tools like Prometheus, Grafana, or Datadog.
- Missing blue-green deployment strategy or canary release rollout testing.
- Skipping patch updates or credential rotation.
Each small oversight can become hours of downtime. Game server security depends on discipline, not just setup.
Conclusion
Game Server Security is more than hardware. It’s a system that can detect, mitigate, restore, and scale automatically.
When you plan for automated failover and recovery, test backups, and maintain real-time monitoring and alerts, your players stay online, always. With DDoS attacks now exceeding 1 Tbps, a strong setup is no longer optional.
Developers and streamers who plan early spend less fixing issues later, and more time building better games.
Build Reliable Servers with CloudPap
If you’re ready to harden your setup with global reliability, CloudPap gives you:
- Global compute power built for developers and streamers
- Secure storage with snapshots, multi-region replication, and NVMe block storage
- Fast routing with BGP Anycast, DDoS protection, and CDN (Content Delivery Network) options
Use it to test DDoS mitigation, schedule automated backups, and deploy worldwide with multi-region replication, all in one platform.
Start securing your game server today with CloudPap and keep your players online, safe, and happy.
Got it. Here’s your FAQ section fully optimized for Google’s People Also Ask box, focused on game server security with strong semantic alignment and factual phrasing.
Game Server Security FAQs
1. What is Game Server Security?
Game Server Security protects your game servers from threats like DDoS attacks, data loss, and unauthorized access. It involves using firewalls / WAF (Web Application Firewalls), DDoS mitigation, rate limiting, encryption in transit and at rest, and automated failover systems to keep gameplay stable and players’ data safe.
2. How do I protect a game server from DDoS attacks?
To protect a game server from DDoS attacks, use DDoS protection best practices such as BGP Anycast/scrubbing networks, load balancers / reverse proxies, and rate limit headers/connection throttling. Aim for DDoS throughput handling of 100 Gbps to 1 Tbps and Packets-per-second (PPS) capacity around 10M PPS to resist heavy floods. Combine this with real-time monitoring and alerts to detect and mitigate attacks within minutes.
3. How often should I back up my game server?
To back up your game server, use continuous and incremental backups with a backup frequency every 15 minutes, hourly, or daily, based on traffic. Keep a retention period of 7 to 90 days and verify backups through integrity checks and backup verification. Always test Time to restore (full DB) — ideally 30 minutes or less — under your RPO / RTO targets.
4. What’s the difference between RPO and RTO in Game Server Security?
The difference between RPO and RTO in game server security is that RPO (Recovery Point Objective) defines how much data you can afford to lose, e.g., 5 minutes.
In contrast, RTO (Recovery Time Objective) defines how long it takes to restore your game server, e.g., 10 minutes. Together, RPO and RTO set the baseline for your disaster recovery plan (DRP) and ensure uptime within your SLA / uptime guarantees, like 99.9% or 99.99%.
5. What are the best practices for game server reliability?
The best practices for game server reliability to achieve redundancy and fault tolerance are:
- Multi-region replication for global performance
- Health checks/readiness probes for instant node monitoring
- Automated failover with failover TTL = 30–60s
- Rolling updates / blue-green deploys / canary releases to patch with zero downtime
- Monitoring & alerting using tools like Prometheus, Grafana, or Datadog
6. Why is encryption important for game servers?
Encryption at rest and in transit (TLS) prevents data theft or tampering between the player, back-end services, and the game server. Even if a network is compromised, attackers can’t read or alter sensitive information. Always combine it with authentication & access control (SSH keys, IAM) for complete protection.
7. How can I test my system disaster recovery plan?
To test your system disaster recovery plan, run regular disaster recovery test plans by simulating outages or data loss. Check your restore speed, failover, and data integrity. Validate backups monthly and log every test result. Adjust your RPO, RTO, and error budget if performance doesn’t meet your SLA / uptime guarantees.
8. What tools help monitor game server performance?
Tools that help monitor game server performance include monitoring & alerting platforms such as Prometheus, Grafana, or Datadog that track metrics like:
- CPU > 85% for 5m
- Packet loss > 2%
- Network bandwidth = 1–10 Gbps
These alerts help you detect spikes early and trigger automated failover and recovery before downtime affects players.


